CV Joint: how it works, symptoms, problems
Updated: August 07, 2021
All front-wheel drive cars have Constant Velocity joints or CV joints on both ends of the drive shafts (half shafts). Inner CV joints connect the drive shafts to the transmission, while the outer CV joints connect the drive shafts to the wheels.
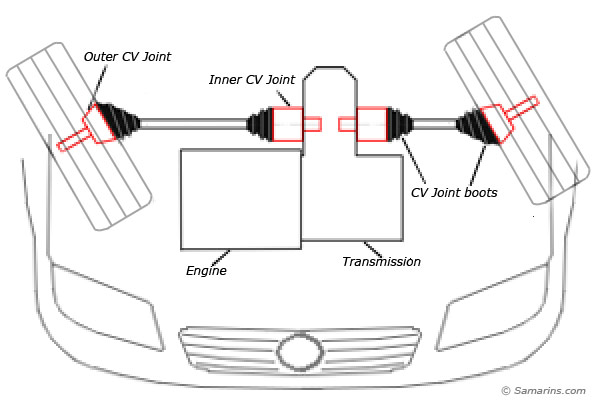 CV Joints in a front-wheel drive vehicle. Click for a larger picture
The CV joints are needed to transfer the torque from the transmission to the drive wheels at a constant speed, while accommodating the up-and-down motion of the suspension. In front-wheel drive cars, CV joints deliver the torque to the front wheels during turns.
There are two most commonly used types of CV joints: a ball-type and a tripod-type. In front-wheel drive cars, ball-type CV joints are used on the outer side of the drive shafts (outer CV joints), while the tripod-type CV joints are mostly used on the inner side (inner CV joints).
CV joint problems
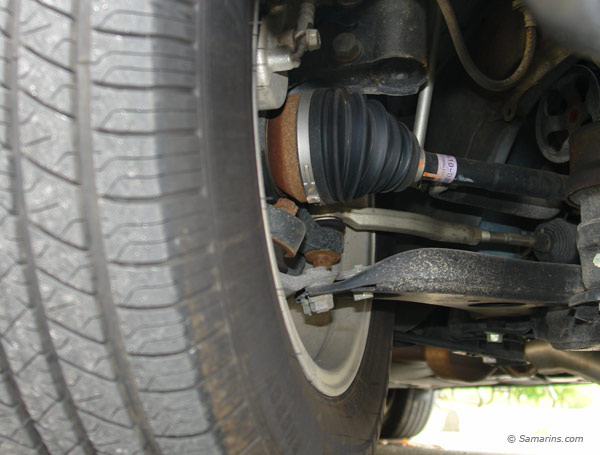 The CV joint boot looks OK.
Click for a larger photo
The CV joint boot looks OK.
Click for a larger photoThe most common problem with CV joints is when the protective boot cracks or gets damaged. Once this happens, the grease comes out and moisture and dirt get in, causing the CV joint to wear faster and eventually fail due to lack of lubrication and corrosion. Often, outer CV-joint boots break first, as they have to endure more movement than the inner ones. CV boots are typically inspected during regular maintenance visits. Your mechanic will look for cracks, tears, loose CV-boot clamps and other damage.
Signs of a damaged CV-joint boot or worn CV joint
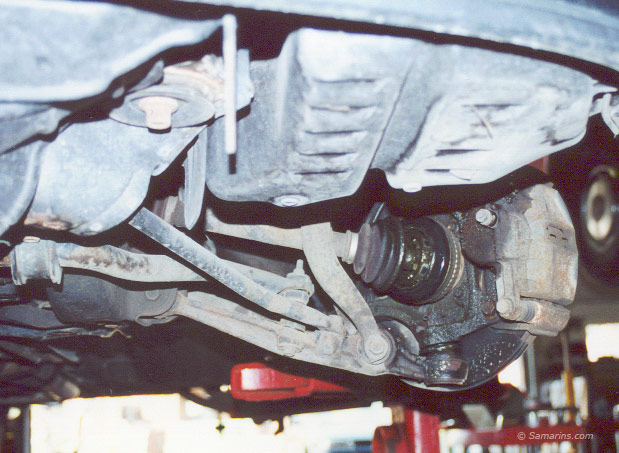 Broken outer CV joint boot.
Click for a larger photo
Broken outer CV joint boot.
Click for a larger photoIf the car continues to be driven with a damaged CV joint boot, the CV joint will wear out and eventually fail. The most common symptom of a worn outer CV joint is a clicking or popping noise when turning. The noise gets louder when accelerating in turns. In the worst cases, a badly-worn outer CV joint can even disintegrate while driving, which could create a potentially hazardous situation.
Inner CV joint failures are rare. One of the symptoms of a failed inner CV joint is lateral (side-to-side) shaking or vibration during acceleration. A worn-out inner CV joint may also cause clunking when shifting from Drive to Reverse or from accelerating to decelerating.
CV joint repairs
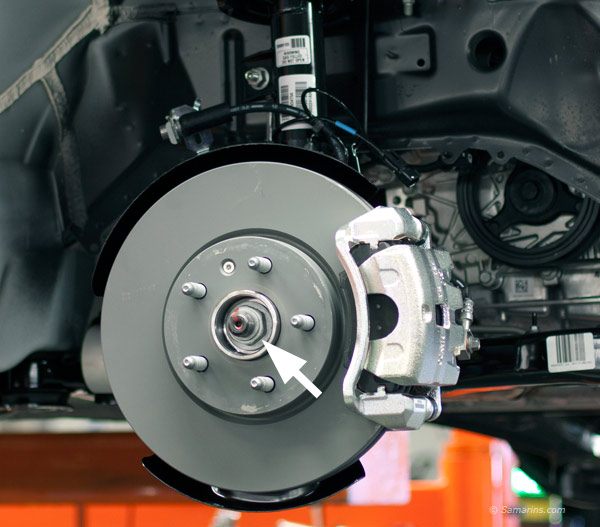 Axle nut. Click for a larger photo
If the CV joint itself is worn out, it cannot be repaired; it will have to be replaced with a new or reconditioned part. Sometimes, a CV joint does not come separately. In this case, the whole drive shaft will need to be replaced. The replacement of the drive shaft could cost from $380 to $800 in a repair shop.
Advertisement
If you are planning to replace the CV joint boot or the drive shaft yourself, you will need a strong torque wrench (or a breaker bar) and the right size socket to break loose the main CV joint lock-nut, also known as axle nut or hub nut (in the photo) because it's very tight. Also, be prepared that the lower ball joint will have to come out in most cases, and it could be quite difficult to do without special tools. The axle nut will also have to be re-torqued to the specified torque after the repair is completed. Check the repair manual for instructions and torque specifications.